This calendar’s monthly planting guidelines are based on USDA zone 9, but they are adaptable to most zones. To find your zone, go to the National Gardening Association’s website. If your zone is 7, 8, or 9, you can safely use this guide. If your zone is 4, 5, or 6, then add a month before beginning your spring tasks and start your fall tasks a month earlier. If your zone is 10 or 11, subtract a month to your spring tasks. Your fall and winter tasks should remain the same as the original guide if you are in zones 10 or 11. These are all general guidelines. Your specific microclimate, which depends on the distance to a large body of water (like gigantic lakes or oceans) and elevation, will make your zone fluctuate. Consult your local county extension office, found here, to get more detailed zone and planting guide information.
Tasks for July:
- Shadecloth
- Increased care for tomatoes in pots
- Pruning
- Harvesting
- Diseases: Send plants to extension agent for analysis
- Continued maintenance
Shadecloth
Depending on your weather and individual microclimate, analyze whether some or all of your tomatoes would benefit from having shadecloth put on their tall cages. When temps rise to 90 degrees or more, tomatoes suffer, and their fruit is more susceptible to sunscald. That’s a sunken white or brown patch typically found on the upper west portions of the tomato fruit (or where the sun’s rays are shining most pointedly upon the round fruit).
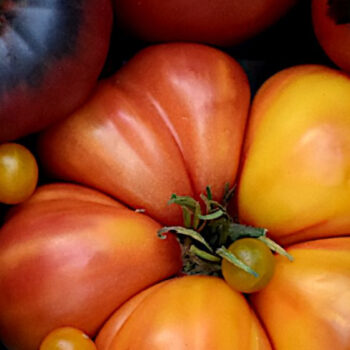
Oxheart (heart-shaped) tomato varieties are more prone to sunscald because their foliage tends to be finely serrated, wispy, and scant, leaving more areas of the fruit unguarded by the plant’s leaves. If you live in a particularly hot climate, consider draping shadecloth over your plants (or at least pin it to the south and west side of your seven-foot-tall cages). The afternoon sun is more intense and damaging than the morning sun, which is why sunscald happens on the upper west area of the round fruit, and so shadecloth will be effective during midday and afternoon sun. Of course, this is reversed when growing tomatoes in the Southern Hemisphere.
Regardless of whether you’re growing oxhearts or not, tomatoes in extreme climates will benefit from a 30 percent shadecloth pinned to their cages when the temperature gets above 90 degrees. Shadecloth of varying percentages—30, 50, and 70 percent shade factors are typical—can easily be purchased online or at your local nursery. Small binder clips work just fine when affixing the shadecloth to the top of the cages; you’ll want it to reach the ground.
If you’re growing tomatoes in black plastic pots, shade the pot with a double layer of shadecloth. Fold your 30 percent shadecloth in half and pin it about a foot above the cage on the south and west side of your tomatoes, or all the way around if you can. This is a smart move because the sun super-cooks the soil inside the black plastic pots—and no amount of water will make a tomato happy in a very hot black plastic pot. You’ll see a marked difference in the health of your tomatoes in black plastic pots if you shade the plastic starting this month.
This advice about shading black plastic pots doesn’t apply to fabric pots, such as Smart Pots, or to light-colored pots or other types of materials: wood, light-colored ceramic, clay, cement.
Increased care of tomatoes in pots
It’s more difficult to grow tomatoes in pots, but we’ve learned a few tricks to better your chances of success:
- Use at least a 15-gallon pot size per plant.
- Use good, fresh organic potting soil, amended using a fish meal, bone meal, worm castings, and all-purpose dry organic fertilizer.
- Mulch the top with four inches of straw or alfalfa hay.
- Drip irrigation should have at least four drip heads; water every day when the weather heats up consistently.
- Fertilize once a week with one gallon of worm casting tea or all-purpose organic liquid fertilizer.
- Shade any black plastic pots.
If you follow these basics, you’ll have a lot better luck with your potted tomatoes. We’ve seen too many times tomatoes struggling in smaller pots. They quickly lose moisture and fertilizers, so keep those up on a frequent basis. You need water and food consistently, right? Well, your breathing, living tomato plants do too.
If you haven’t yet started extra watering of your potted tomatoes or fertilizing them once a week, July is the time to do so.
Pruning

July is about the time to start pruning. There are many disagreements from master tomato gardeners worldwide about pinching off the suckers or leaving them be. Again, there are good reasons to do so and good ones to leave them alone.
Tomatoes need their leaves for several reasons: photosynthesis, transpiration, and respiration, as well as to uptake the foliar feeding you are giving them through weekly applications of worm casting tea. They also use foliage to shade their fruit and prevent sunscald.
However, since we are artificially forcing the tomato into a vertical cylindrical mass by pushing its branches inside of a seven-foot-tall cage, the tomato plant can and oftentimes does get crowded inside the cage. It behooves the plant if you reach inside the mass and remove some interior (not exterior) leaves. This serves to free up airflow, which is important for pollination and disease reduction. It also serves to create a dappled-sunlight environment for the fruit. Fruit sweetens as the sun ripens it, and dappled sun is the best fruit ripener. The deep, dark shade in the interior of the plant does not serve it well.
You can also remove interior weak branches while you’re pruning out some densely growing leaves. Don’t remove anything if your plant is an oxheart, or looks otherwise spindly, or already has plenty of dappled sunlight in the interior of the plant. A good rule of thumb is that if you can stand on one side and easily see through to the other side of the plant, then leave the foliage be for now. Revisit this exercise in August as the plant develops.
You’ll find a lot of old-school gardeners advocating the removal of suckers (new growth you’ll find at the intersection “node” where a branch and leaf meet), but you can generally leave them on the plant through July. These suckers do indeed turn into branches that can flower and end up giving fruit. So leave them be for now.
Harvesting techniques
You should start getting ripe fruit this month unless you got a late start with planting or live in a cooler climate. The first typically ripen low and inside the plant. Because of this, you may miss your first ripe fruits because, at this point, the plant is getting quite big. So keep checking down low.
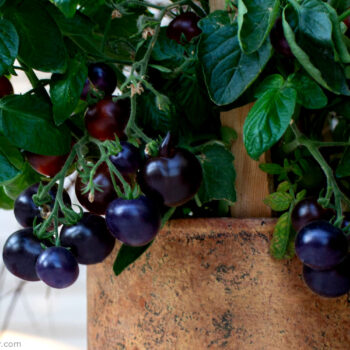
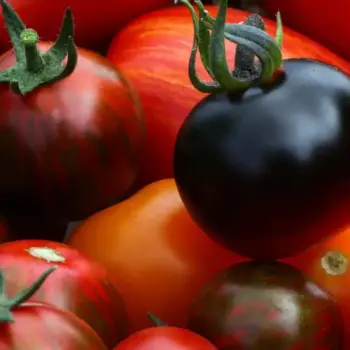
Note that “hang time” is an important concept to understand. The fruit will turn its final color before it is actually ripe. It needs to photosynthesize a day or two more to increase its Brix content (measure of sugar content). So leave those first few tomatoes a couple of extra days after they develop their ripe color, be it red, pink, orange, green, white, yellow, brown, purple, or bi-color.
Many heirlooms, when ripe, will still have “green shoulders.” This is the top of the tomato still displaying some green color even though the bulk of the fruit is colored up and starting to soften, indicating ripeness.
“Feel” is also important to know. Tomatoes other than paste-type are generally ripe when they yield to gentle pressure, like a ripe avocado. Paste-type tomatoes—those who have a different shape, such as pear, elongated, or oblong—will stay firm after they color up and are nevertheless ripe to pick. Note that oxhearts are true to form for beefsteaks and round cherries: they’ll be ripe when they color and yield to gentle pressure.
Use pruning shears to pick your tomatoes. If you simply pull the fruit from the plant, you can break off other non-ripe fruit, since many of them are on the same truss, or you can break a limb off the plant. Finally, if you simply pull rather than cut, the fruit can be so firmly attached to its stem that the fruit tears too. So unless you know you’ve got a variety (and there are some out there) whose fruit attaches weakly to its stem, try to clip them off rather than pull.
It’s possible to leave the tomatoes too long on the bush, and then their flavor degrades. There is definitely a “sweet spot” of time where the tomato is perfectly ripe. It has hung on the bush long enough for the sun to sweeten it, but not too long that it’s gone mushy and tasteless.
Disease issues

Tomatoes can contract diseases from many sources: their seed, the air, the soil, insects, and physical contact with a disease vector. This last one is a bit tricky, but an example of it is the tobacco mosaic virus—a disease imparted to a plant by physical contact with someone who’s been smoking tobacco. Don’t smoke tobacco around your tomato plants or touch them with clothing or fingers that have residual tobacco on them.
Knowing that tomatoes can be infected with various diseases in many different ways, it’s difficult to diagnose tomato diseases. Not only that, but also it’s almost impossible to cure the tomato once the disease is identified correctly. The best practice is to try and prevent the disease through various methods of cultivation: Choose disease-resistant varieties to grow, space them properly, plant them with calcium additives (bone meal and eggshells), use mycorrhizae fungi on the rootball, water them correctly, stake them appropriately, remove leaves touching the ground, and spray with a consistent regimen of worm casting tea and aspirin. All these things help prevent diseases. But it’s not a guarantee because, as noted above, there are a lot of different vectors (methods) of disease transmission.
If you feel that your tomatoes are suffering from some sort of illness and you’ve ruled out minute insects such as thrips, mites, aphids, and psyllids, then consider investing your time into a little investigation. Although no one ever wants to do this, now is the time to pull up a really bad-looking plant—roots and all—and deliver it to your local extension office for them to perform an analysis on it. Wash off the roots with water, bag the entire plant in a plastic bag, and send it over. Of course, figure out your local extension office’s location first. Call them to see if they do this sort of diagnosis before driving blindly over there (or sending your package in the mail). Here’s a link to find your local agent: https://www.gardeningknowhow.com/extension-search
If your local county extension agent doesn’t do that sort of thing, then Google the nearest plant analysis labs. You’ll have to pay for the knowledge of what happened to your tomato plant, but this might be the best money you’ve ever spent on your garden. Knowing how to fight your battles gives you a much better chance of winning. And since there are a good hundred different diseases your tomato can have, it’s best to figure it out rather than guessing.
Continuing maintenance for July
You should still be pushing into your tall cages all the branches that want to grow out of them. This is an ongoing, several-times-a-week thing.
Also, keep up the pruning of crowded interior leaves. The exterior perimeter leaves are needed to help support the plant inside the cage; plus, these leaves give dappled shade to your tomato fruit. When you’re removing some interior leaves, this is a good time to also remove weak-looking (very thin) branches. Also, remove any yellowing leaves as well as any leaves touching the ground.
Continue the regimen of worm casting tea and aspirin spray each week. This is important for feeding tomatoes in the ground as well as increased blossom production, increased disease resistance, and decreased pest pressure.
For potted tomatoes, not only do they need the spray, but also they need regular in-the-pot fertilizing. Use either full-strength worm casting tea (a gallon or two per plant, per pot) or a gallon of all-purpose liquid organic fertilizer. Avoid using fish emulsion—it’s higher in nitrogen than most tomatoes want. You’ll get a lot of green, leafy growth but not a lot of fruit if you use fertilizers high in nitrogen.
Don’t forget to check for pests using your jeweler’s loupe. Also, do a full-vision inspection for larger critters, like tomato hornworm and tomato fruit worm. You’ll see evidence of their infestations through stripped branches, eaten fruit, and frass (their droppings on leaves—either black or green). For these wormy critters, a spray of Bt or spinosad should take care of them. You can also invest in some predatory wasps called trichogramma. These are extremely tiny wasps that will do no harm to you; their favorite food are worm-like pests. You can buy their eggs online.